Hi all! I have a little tutorial to share with you today! This is my
first one ever so please bear with me. My tutorial is also featured at
Catch The Bug Challenge Blog.
I would like to show you how to make adorable rope birds nests to go on
your projects. I didn't have a few of the supplies I needed but I made
do. And so can you!
Supplies needed:
beads (bird eggs are normally white or blue but any color will do) ( I love the shine from glass beads)
rope or hemp twine
glue gun or some form of strong glue
clothespin
craft tweezers
scissors
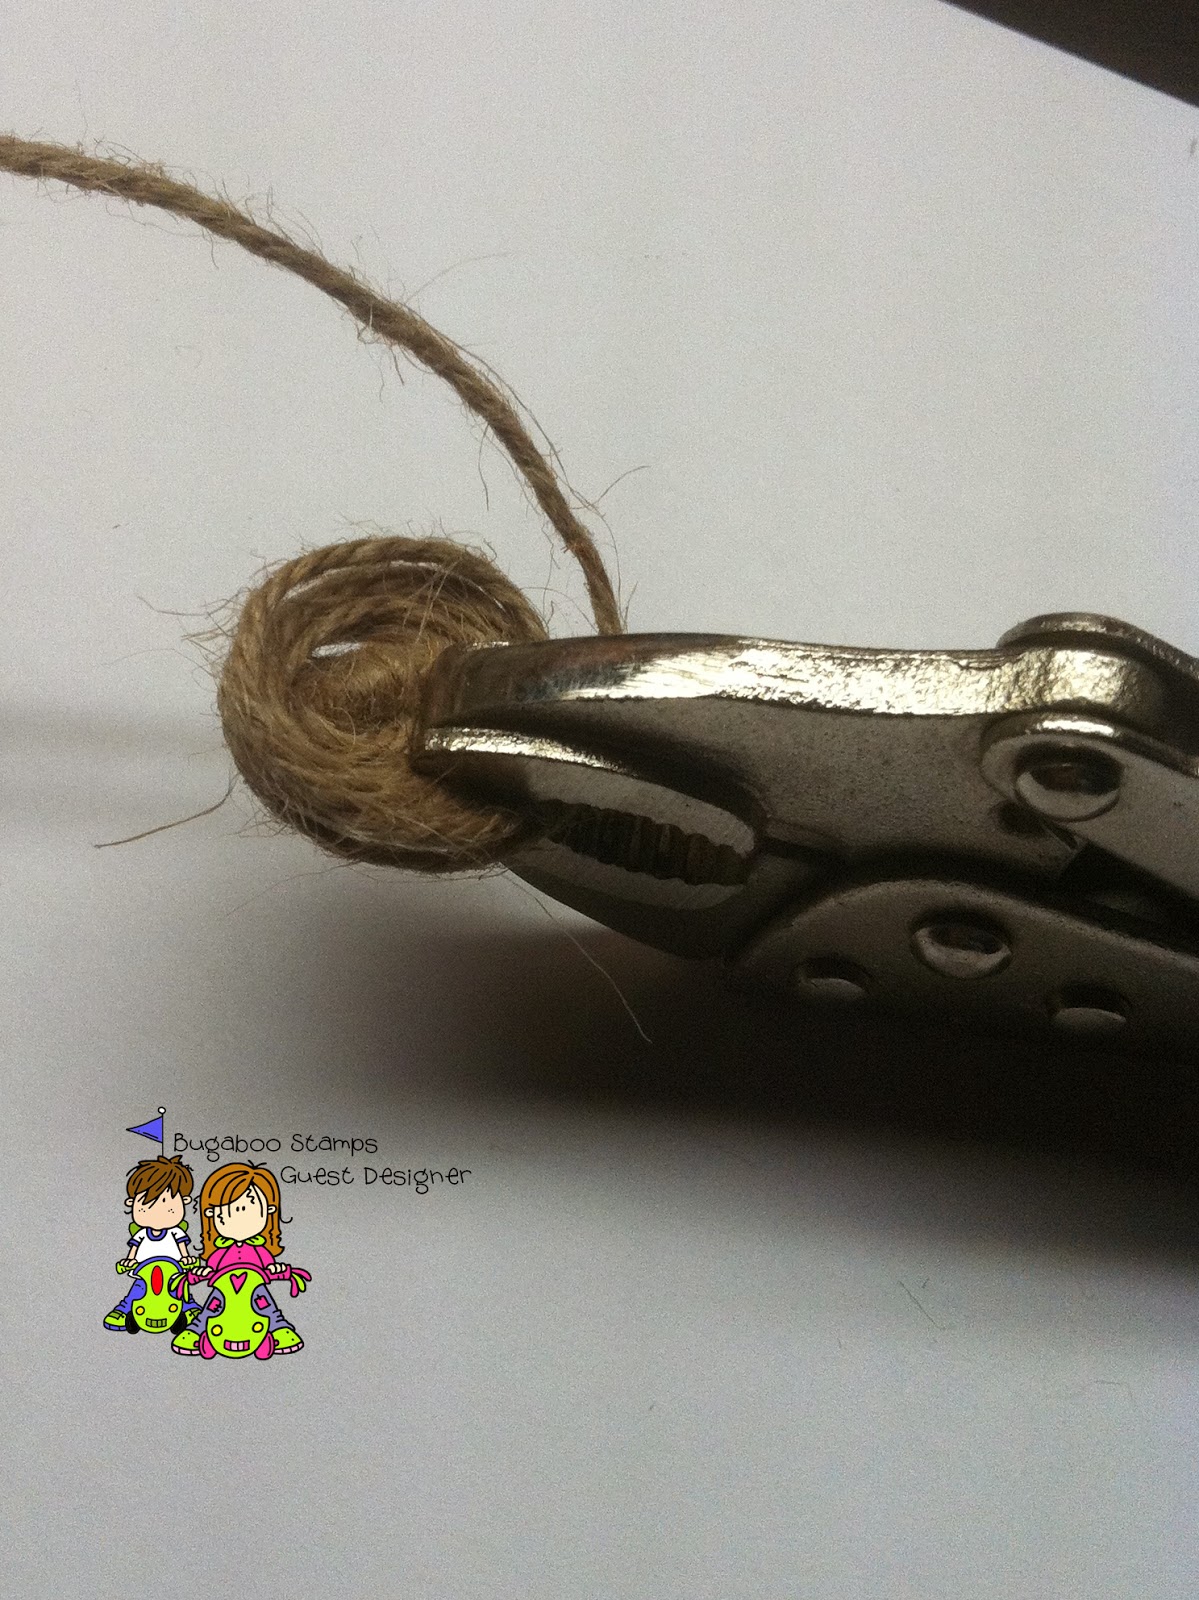
Start with your rope or twine and put a knot in the end. This is where
you will wrap the twine around itself. The knot makes it easier to
work with. You can leave the twine attached to the roll or cut it in
advance. I made the knot farther up with this piece of twine since you
don't want to use the frayed end.
Once
you have the knot you start rolling the twine around the knot to form a
circle. The size depends on what type of project you are making and
how big you want the nest. I have found my favorite size to be one
inch in diameter. Once you have the nest to the size you want you use
your clothespin to hold it together. I know this isn't a clothespin but
I couldn't find mine. Basically, any tool that can hold it together
will do.
Add glue to the back of the nest to hold it
together. I have found that more glue is best. This little nests love
to unravel without enough glue. You can leave the clothepin for a few
minutes to let the glue dry.
Here is what your little nest will look like at this point!
Using tweezers and your glue gun, attached a few beads to the inside of the nest.
How
cute do they look all nestled in there? You can leave your nests to
look like this or you can cut another piece of the twine a few inches in
length to wrap around the top and bottom of the nest for the beads to
be a bit more secure. Although if you use enough glue, I don't think
this step is needed if you prefer the nests to look like this. Your
nests are done at this point and can be attached to your projects with
glue dots or your glue gun!
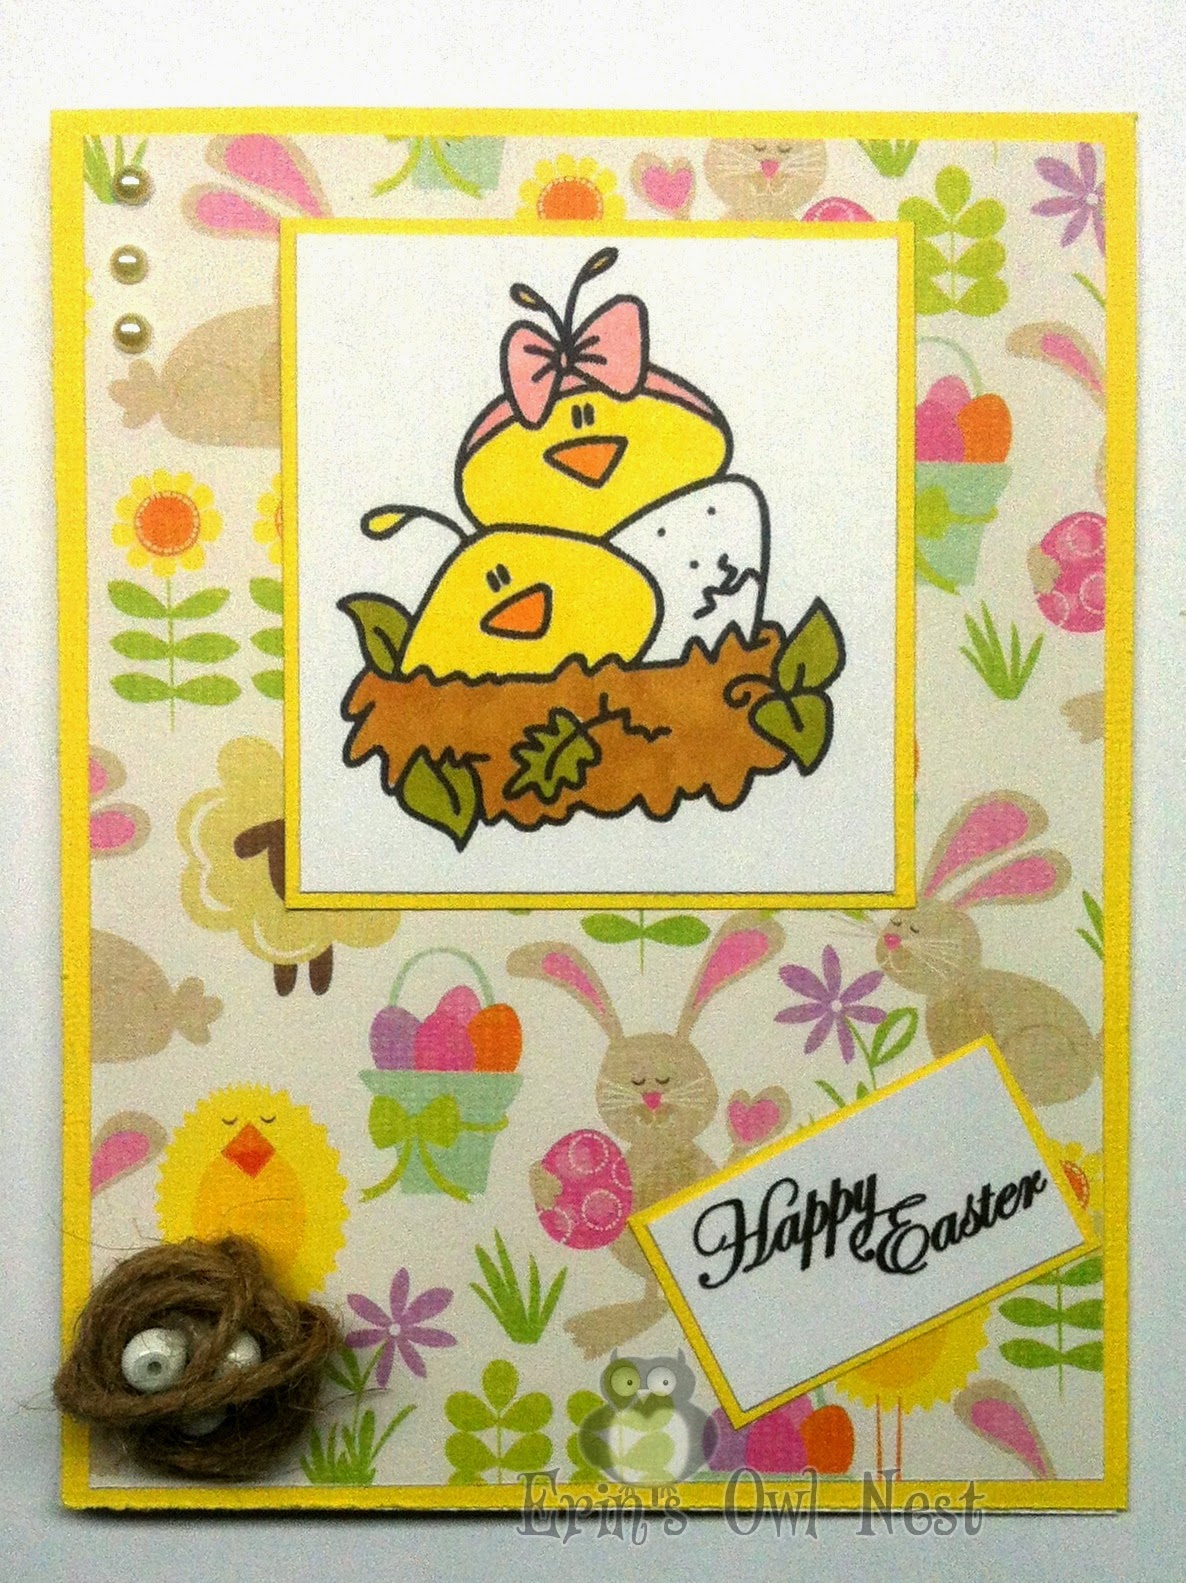
End result of your rope nest!
I
certainly hope you enjoyed my tutorial ( that it was informative
enough) and that you try out some nests on your spring cards. This card
featured
Spring- bird from
Bugaboo stamps.
Colored with my promarkers. The easter paper is from my stash. I added
some pearls in the upper corner. I first saw the nests at
Katie Skiff's blog and adapted it to work for me. You can make all different types and colors of nests!
This is my last post as a guest designer for Catch the big! I have certainly enjoyed my time with the team
Hugs,
Erin
Entering in the following projects:
scrappy mom - hippity hop
digi choosday - wings
patties creations - easter


Absolutely adorable, Erin! Thanks for the tutorial! I'll have to give that a try!
ReplyDeleteErin!!!!! I love this! I am going to try this myself! What a fabulous little bird's nest you made! I loved your tutorial! Have a wonderful day, my friend!
ReplyDeleteThis is adorable Erin! I am making a "fairy garden" & this will be perfect to put in the tree....nothing at all to do with cards but a fun project anyway!
ReplyDeleteHugs, Renee
loving this Erin ty for the tutorial hugs Judith xx
ReplyDeleteSweet tweets!
ReplyDeleteThanks for playing in our "Easter!" Challenge #90!
Sandi ♥
DT Coordinator for Pattie's Creations Challenge!
and Pattie's shop
Home of Pattieboop and Allie!
This is soooo cute Erin. Thanks for sharing and what a great project for spring, which seems to finally be here in Southern Ontario !!
ReplyDeleteHow cute is this
ReplyDeleteLove the nest
Thank you for joining us at Digi Choosday xx